Install free Let’s Encrypt
Superior hosting like SiteGround, GreenGeeks, and Flywheel included Free SSL’s on active hosting plans. You can install them with a click of a button.
Step One:
From the cPanel

Step Two:
Click on Let’s Encyrpt

Manually Installing A SSL
Now I know the first question you’re going to ask is where to purchase one of these magical certs and the answer is Namecheap.
Step One:
Getting A CSR
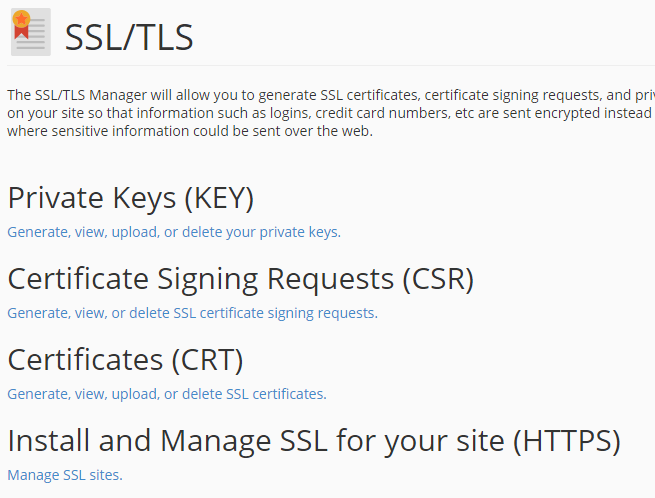
Locate and click on SSL/TLS Manager

Click on Certificate Signing Requests (CSR)

Once you filled out the domain inforamtion you’ll then click on Generate. Copy & Past that into Namecheap.
Step Two:
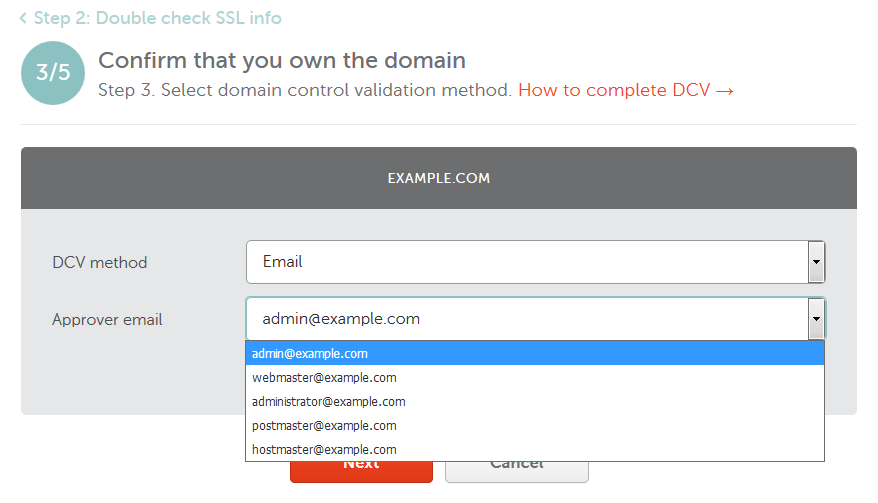
Validating Your Domain
Namecheap gives you 3 choices on how you want to validate your domain.
Email validation
HTTP-based validation
DNS-based validation
The easiest way would be to use email validation.

Step Three”
Installing the Cert
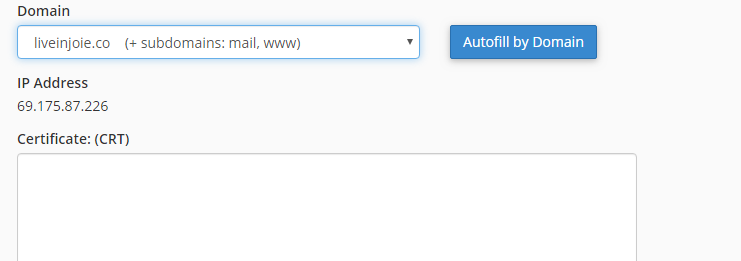
Head on back to the cPanel and click on Manage SSL Sites. Once you select yor domain hit autofill then Install Certificate.

Force HTTPS
Change the Settings / Home URL to HTTPS

This will log you out so don’t freak out!
Add this to the wp-config.php file via FTP to force SSL on your dashboard pages too.
define('FORCE_SSL_ADMIN', true);
Add the following rewrites to your .htaccess file via FTP to redirect any incoming links to their HTTPS counterparts.
Change “yoursite.com” to your domain name. On the third line, use the new URL(with or without the www – whichever is your preferred URL).
RewriteEngine on
RewriteCond %{HTTP_HOST} ^yoursite.com [NC,OR]
RewriteCond %{HTTP_HOST} ^www.yoursite.com [NC]
RewriteRule ^(.*)$ https://www.yoursite.com/$1 [L,R=301,NC]
Troubleshooting:
Test out your SSL using Why No Padlock?
Share Your Thoughts
