Let’s talk about fonts, who doesn’t love fonts? They make our things pretty, but what about the web? Where do you use them? You’ll need a font for the body, the headline (title), header (site title) etc.
What do we get these said web fonts, well there are tons of sites like MyFonts, Font Squirrel, and Typekit to name a few.
Step 1: Download your files
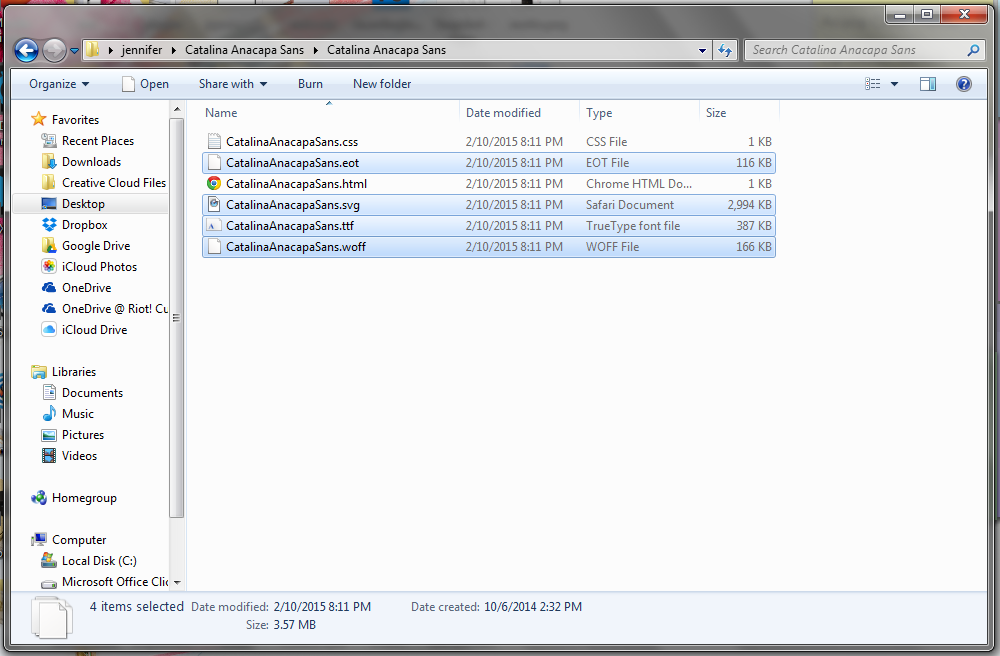
So now that you’ve purchased the font you’ll be using on your site. You’ll need to download the fonts on your computer (if you have a mac it extracts the file for you) extract your file and place in a place you’ll remember. Make sure you’re using the license for the font properly also.
Usually, you’ll get about 4 files (.eot, .svg, .ttf, .woff) you’ll want to upload all of these into your theme.
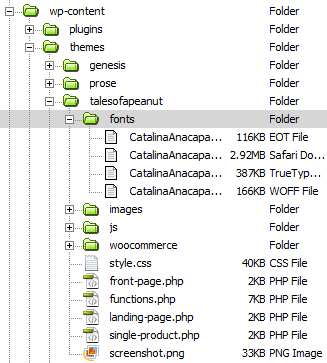
Step 2: Uploading into your child theme
This step is pretty self-explanatory, all you do is create a folder in your theme and name it fonts. Then you’ll upload via FTP all your font files into that folder. Easy breezy.
Step 3 Include the font in your CSS stylesheet
Now it’s time for some code (mostly copy and paste) most web font providers will provide you with the css code you’ll need to install the font onto your theme. Here’s what that format looks like.
/*
 * Web Fonts from awesomefontplace.com
 *
 * Font copyright information, which you should
 * never delete and should always be included
 * in your CSS where ever you call the fonts files.
 * Copyrights matter.
 *
 */

 @font-face {
    font-family: 'FontName';
    src: url('fonts/FontName.eot');
    src: url('fonts/FontName.eot?#iefix') format('embedded-opentype'),
        url('fonts/FontName-webfont.woff') format('woff'),
        url('fonts/FontName-webfont.ttf') format('truetype'),
        url('fonts/FontName-webfont.svg#FontName') format('svg');
    font-weight: normal;
    font-style: normal;
}
With your purchase font information, you’ll enter that into the stylesheet.css file.

make sure to save your work.
Step 4: Font Declaration
Now that we’ve uploaded the web font in your child theme let’s start using it on the site itself. If you have the basics knowledge of HTML/CSS you’ll know that the code you’ll need to use will look something like this
.entry-title {
    color: #222;
    text-decoration: none;
    font-family: 'FontName', sans-serif;
}
Step 5: Check your work
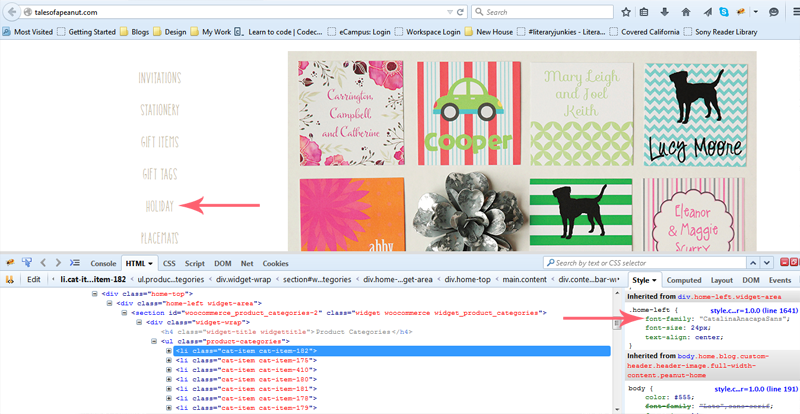
Now let’s make sure the font is correctly installed. Head on over to your browser and turn on that firebug tool.

There you have it, you installed a web font. Woot woot!
Get more lesson like this at the Espresso Workshop.


Hi Katrina,
I’m a newb to web design. HTML, CSS, Linux, etc., etc. Your tutorial is very clearly written and will undoubtedly save me from much hate and discontent!
I do have one criticism: While Firefox is an excellent browser, not everyone uses it. I am using Chrome myself as are many others. I don’t know if the firebug tool you reference in your final (and very important) step is cross platform compatible or not, but I shall find out. It looks to be a debugger (which would make sense).
Still I appreciate your tutorial and thank you for posting it!
Frank
Hi Frank,
Firebug is available for cross-browser and chrome, just take a look http://getfirebug.com/releases/lite/chrome/
Thanks