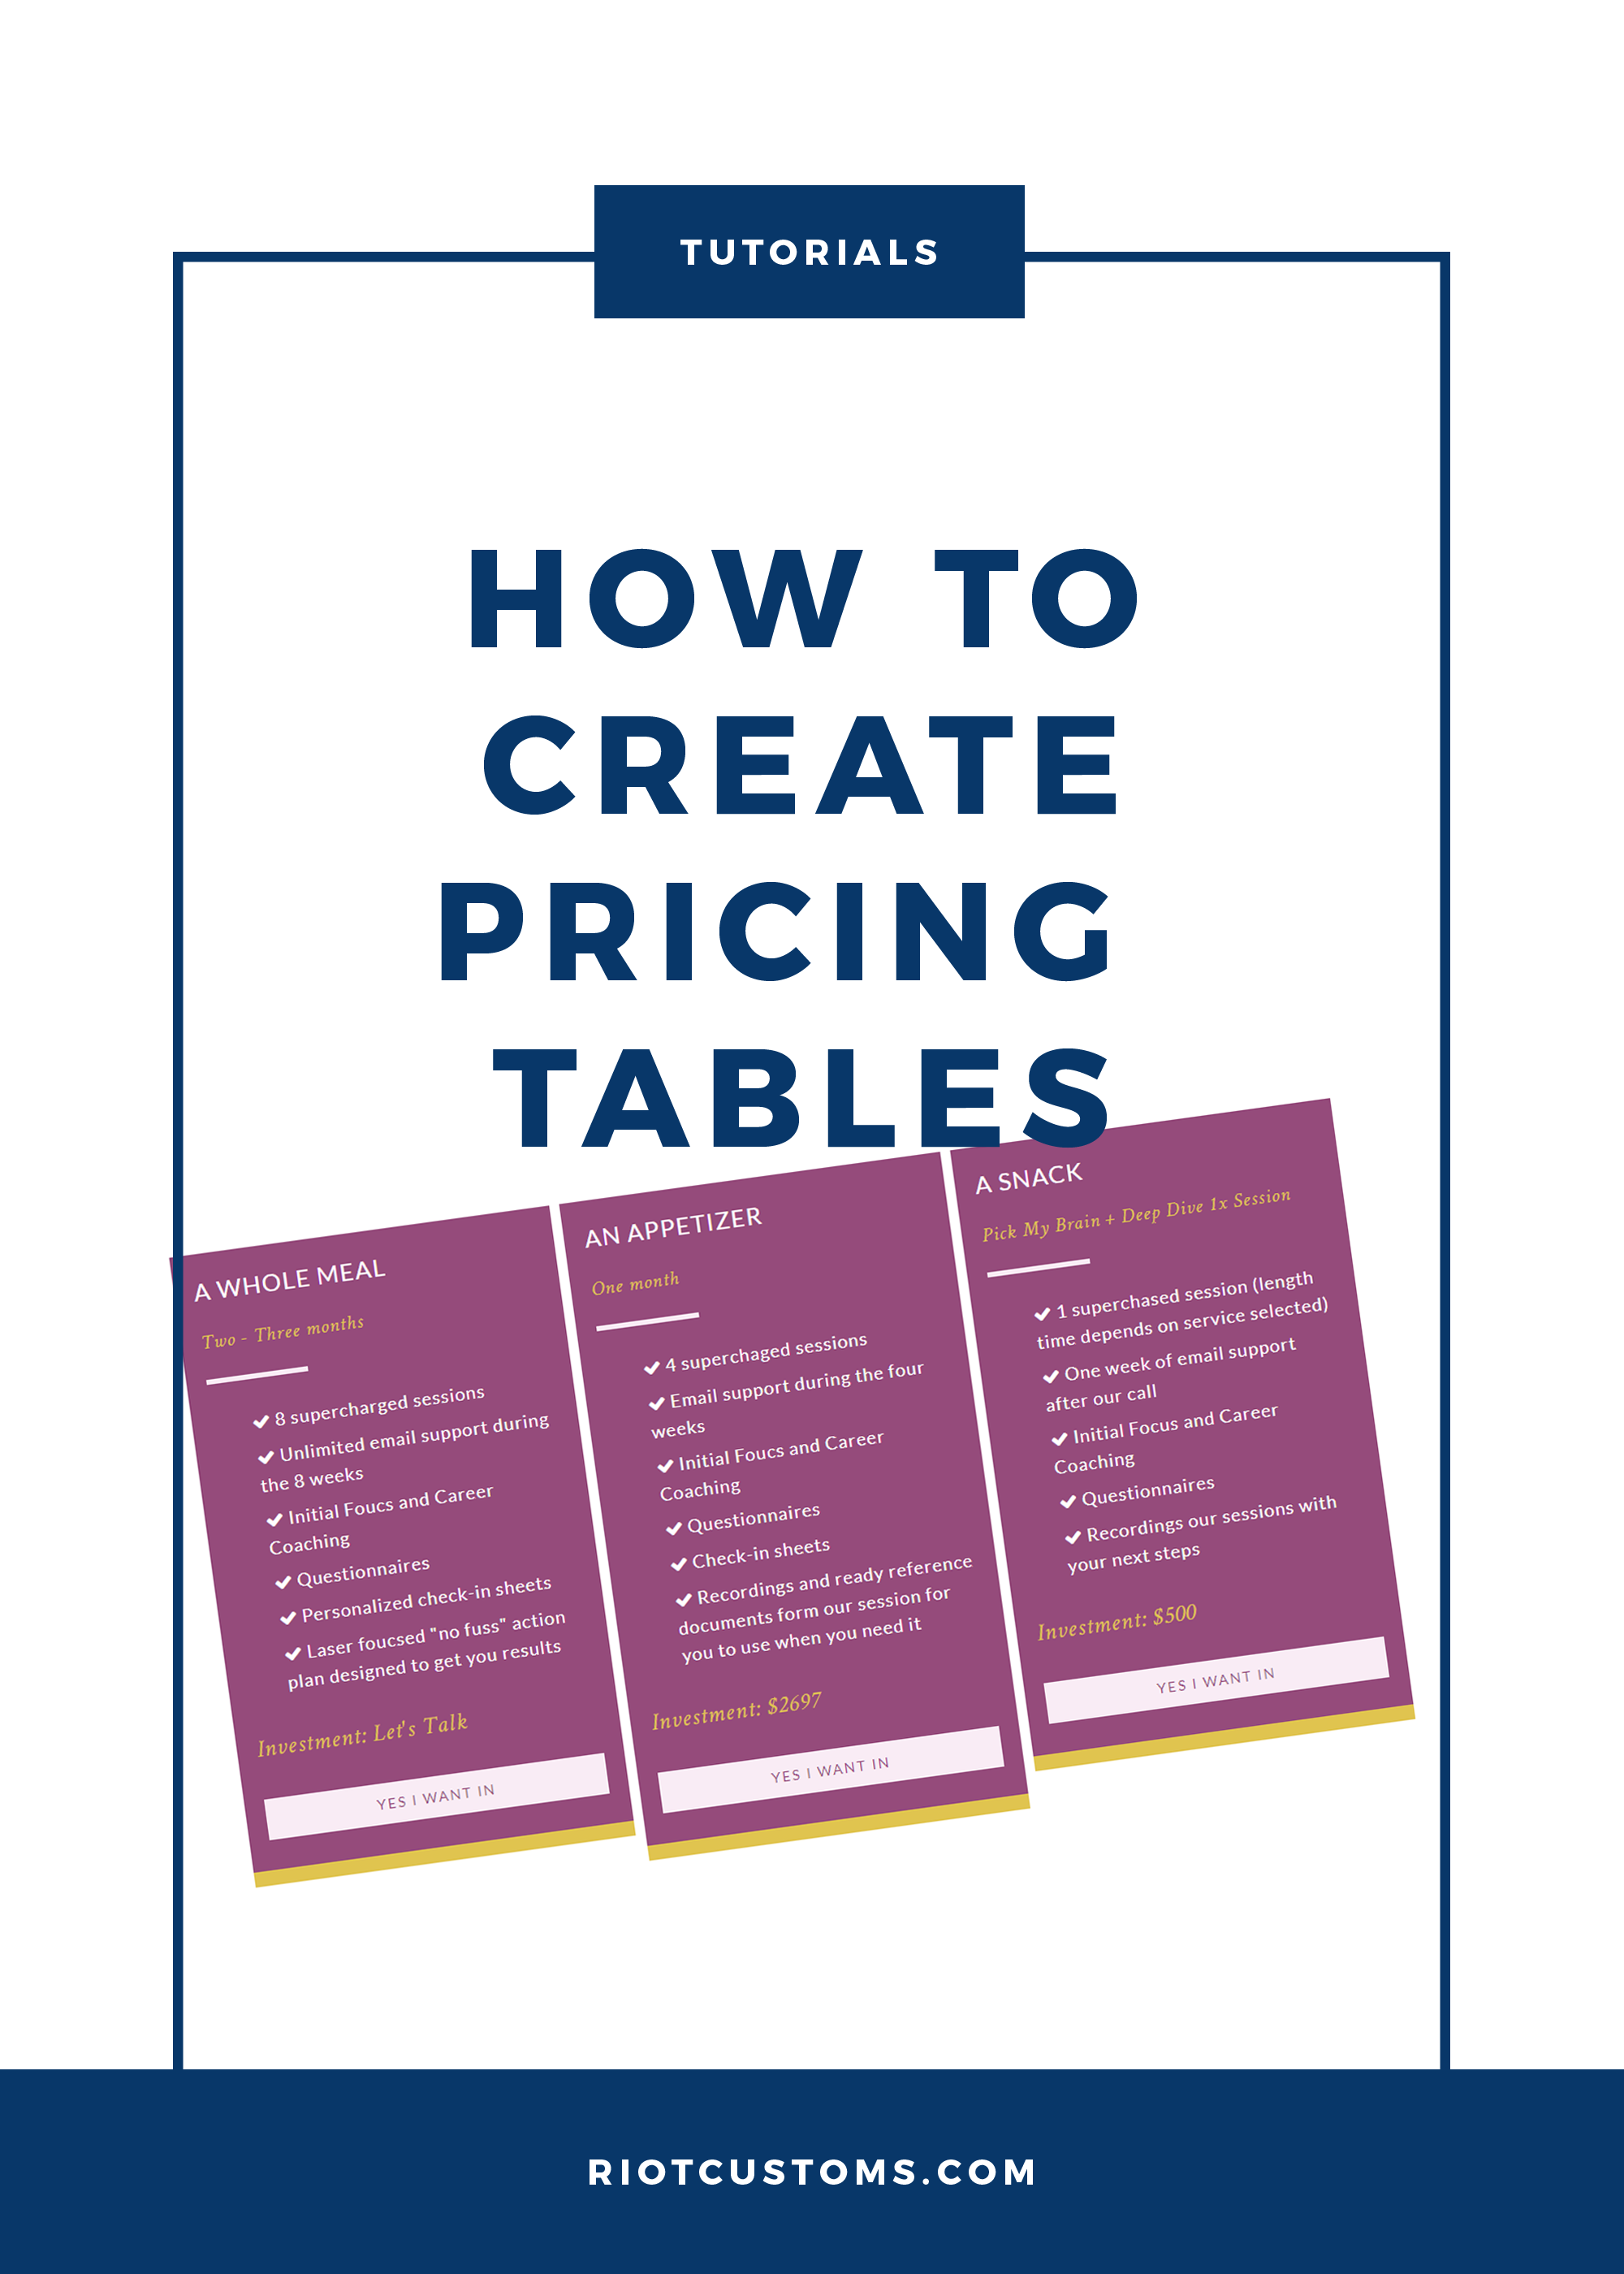
In this tutorial I’m going to break down the code, on how to create a pricing table on your Genesis WordPress site.
Let’s start by figuring out what your tier pricing is going to be first. I’m using a 3 tier pricing plan, and in this tutorial I’ll be using Genesis built in column classes.
First I will need to name my class for the pricing table so let’s just go with pricing table. So my HTML code will look something like this into a page that I want customers to see the plans.
Since I’m using a 3 tier plan, I’m going to insert my 1/3 column classes by adding one-third first and one-third as classes. Which will make my code like more like this now….
We’re looking good, all our tables are in place. Let’s add some content, like a header and a list of goodies that it comes with. Meaning I will need to add classes such as < h4 > and ul li for bullets. Here’s what it looks like all pulled together.
Now that we got that out of the way let’s make it look like something worth showing off. First I’ll need to open my style.css file and start writing these codes in .pricing-table get some details. Assign declarations to .pricing-table h4 takes care of the header and .pricing-table .one-third takes care of the columns. Then by adding .pricing-table .button gives me the oppertunity to create a purchase button for that plan. So let’s see that we got…
How easy was that? Now off you go and fancy up your pricing tables and sell some shit.

Hey there,
Thanks for this little snippet! Just thought I would mention, I tried it – looks like you added:
.pricing-table .one-third {
width: 33.33%;
}
But if you are using a Genesis theme, this line actually breaks the responsive functionality. Otherwise, this was a big help in cutting down my time. Not trying to steal your thunder, just thought I would let you know!
Awesome site by the way!